Photos have become an essential part of our lives, whether for social media, personal memories, or professional use. With the rise of mobile photography, editing photos on your iPhone has never been more critical. If you’re looking to take your photo editing skills to the next level, you’re in the right place!
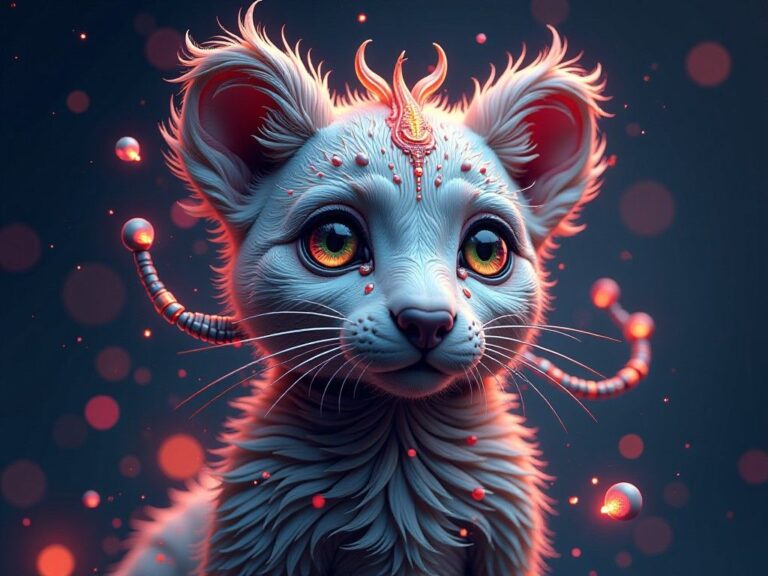
In this comprehensive tutorial, we will explore how to edit photos on your iPhone while using the innovative AI-driven app, PopDoll. This powerful 3D image generator allows you to transform your ordinary images into captivating 3D creations that are sure to impress friends, family, and followers. Plus, you’ll learn how to download PopDoll from Google Play to get started!
Getting Started with Photo Editing on Your iPhone
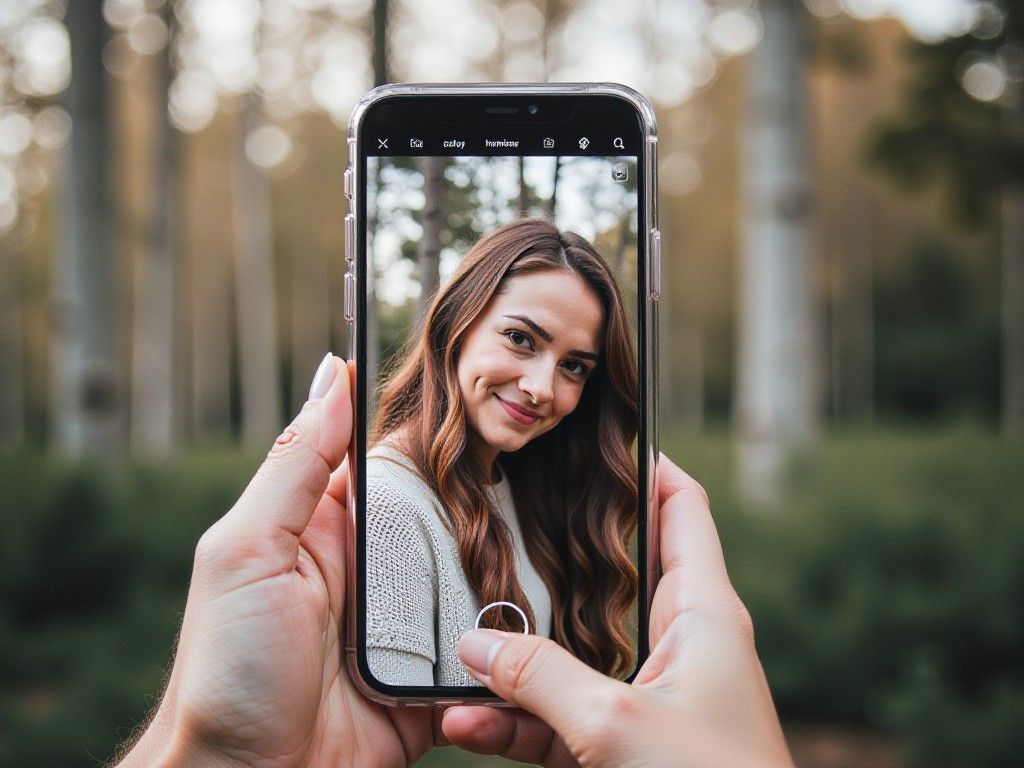
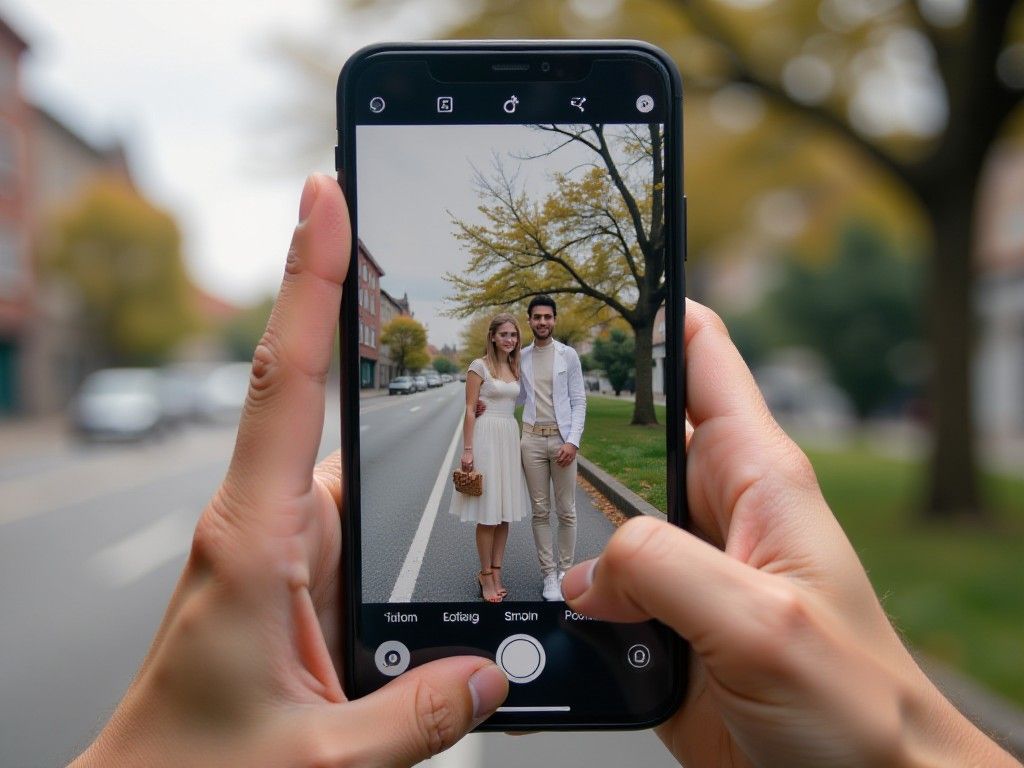
Before we delve into the specifics of using PopDoll for photo editing, let’s cover the basics of editing photos on your iPhone. The built-in Photos app on iOS provides a host of editing features to enhance your images. Here’s a step-by-step guide to help you edit your photos using your iPhone.
Step 1: Open Your Photos App
- Locate the Photos app on your iPhone. It’s typically represented by a flower icon.
- Tap the app to open it.
Step 2: Choose the Image You Want to Edit
- Browse through your library and select the photo you wish to enhance.
- Once you tap the photo, it will open in full screen.
Step 3: Access the Editing Tools
- In the top right corner, you’ll see an Edit button. Tap this to enter the editing mode.
- You will find various options at the bottom of the screen.
Step 4: Use the Editing Features
The Photos app offers various tools:- Auto-Enhance: This option is represented by a magic wand symbol and instantly applies quick adjustments.- Filters: Swipe left or right to see different filters. Tap to apply one of them.- Adjustments: Tap on the adjustment icon to manually change brightness, contrast, saturation, sharpness, and more.- Crop and Rotate: If you need to crop your image or adjust its orientation, use the crop icon.
Step 5: Save Your Edits
- After making the desired adjustments, tap Done in the top right corner.
- Your edited photo will be saved, and you can always return to the original if needed.
Step 6: Prepare for 3D Transformation
After you have edited your image, the next step is to convert it into a stunning 3D creation. This is where PopDoll comes into play!
Create your perfect 3D avatar today with PopDoll!
Introducing PopDoll: Your AI-Powered 3D Image Generator
PopDoll is an intuitive AI-driven app designed to take your photos and transform them into mesmerizing 3D images. Whether you want to create eye-catching social media graphics or simply explore the possibilities of 3D art, PopDoll serves as your go-to solution.
Key Features of PopDoll
- 3D Image Generation: Convert your 2D photos into beautiful 3D renderings quickly and easily.
- Simple User Interface: Designed for users of all skill levels, making it easy to navigate and create.
- Customization Options: Adjust various settings to personalize your 3D images to match your vision.
How to Download PopDoll
Getting started with PopDoll is a breeze! Here’s how to download the app onto your iPhone:
- Open the Google Play Store on your device.
- In the search bar, type “PopDoll” and hit enter.
- Tap on the appropriate link from the search results.
- Click the Install button to download the app.
Once the installation is complete, you can launch PopDoll and begin creating your 3D images!
Step-by-Step Guide to Create 3D Images with PopDoll
Now that you have downloaded the app, let’s walk through how to use PopDoll to transform your edited photos into stunning 3D visuals.
Step 1: Launch PopDoll
- Open the PopDoll application from your app drawer.
- You may need to create an account or log in to use the various features.
Step 2: Upload Your Edited Photo
- Once in the app, look for the option to upload or choose an image.
- Navigate through your library and select the edited photo from the Photos app that you wish to transform.
Step 3: Customize Your 3D Image
- After uploading your photo, you will find several customization options.
- Play around with the various settings to adjust depth, texture, and angle for your 3D effect.
- Take your time to explore the features until you achieve the desired result.
Step 4: Preview Your 3D Image
- After customizing, preview the 3D image.
- Make any last adjustments if needed to ensure it meets your expectations.
Step 5: Save and Share Your Creation
- Once satisfied with your 3D artwork, save the image within the app.
- You also have options to share directly to social media platforms or save it to your device for future use.
Tips for Maximum Impact
To make the most out of your 3D images, here are some useful tips:
- Select High-Quality Images: Start with high-resolution photos for better results.
- Utilize Natural Lighting: Images taken in good lighting conditions usually translate better into 3D.
- Experiment with Different Photos: Try various styles of photos to see how they fair as 3D images.
- Regularly Update PopDoll: Ensure you’re using the latest version of the app for the newest features and improvements.
Conclusion
Editing photos on your iPhone doesn’t have to stay at a 2D level. With PopDoll, you can transform your creations into striking 3D images that can captivate and engage your audience, enhancing your digital presence.
From basic photo enhancements using your iPhone’s native tools to exploring the unique features of PopDoll, this tutorial has equipped you with everything you need to elevate your photo editing game. So don’t wait any longer—download PopDoll today from Google Play here and start creating remarkable 3D images right from your iPhone!
With practice, you’ll master the art of 3D photo editing and bring your photographic visions to life like never before. Happy editing!